エックスサーバーのお問い合わせフォームをカスタマイズする方法

前回の記事で、エックスサーバーの標準CGIでお問い合わせフォームを作成する方法をご紹介致しましたが、今回はカスタマイズする方法を紹介いたします。ちなみに今回の記事は公式マニュアルにも載っないcssやテンプレートのカスタマイズ方法をご紹介致します♪
なお本記事は、既に「メールフォームのインストールが完了している」事を前提に勧めます。インストール方法がわからない方は、前回の記事「エックスサーバーの標準CGIでお問い合わせフォームを作成する方法」をご参照ください。
カスタマイズする方法
1.インストール完了時に表示された「設定画面」のURLにアクセスします。
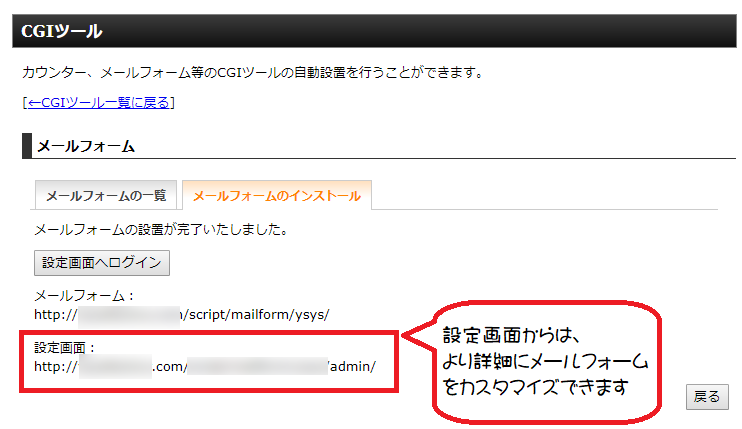
補足
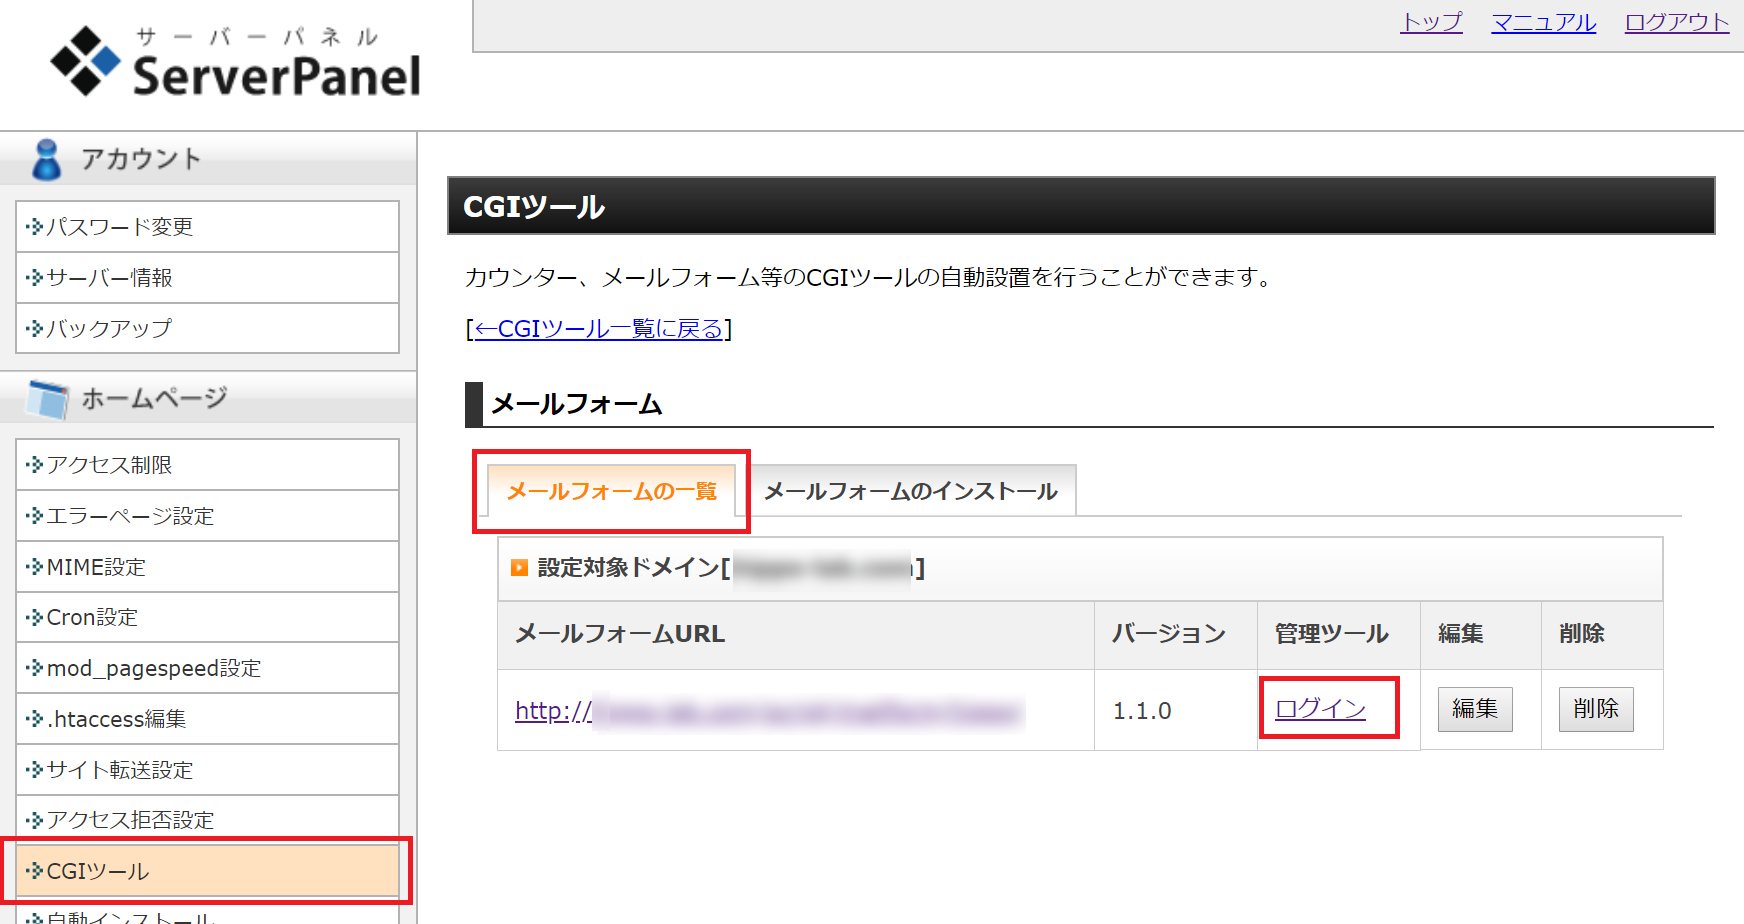
もしインストール時に表示された「設定画面」のURLを忘れた場合は、エックスサーバのサーバーパネルから「CGIツール」>「メールフォームの一覧」>「ログイン」を選択すれば、設定画面にアクセスできます。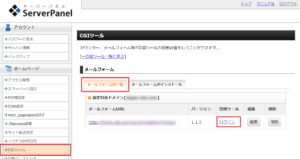
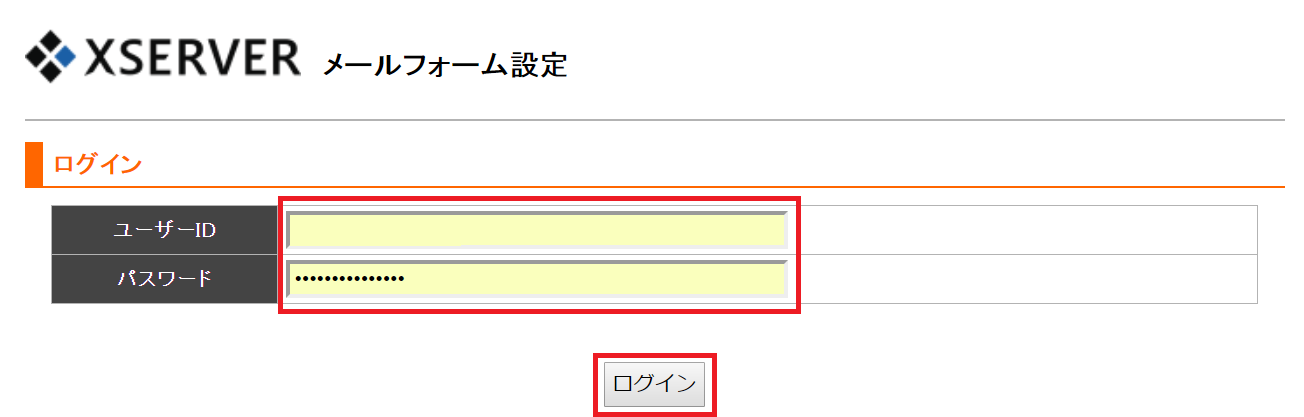
2.ユーザ名とパスワードを入力し、ログインします。
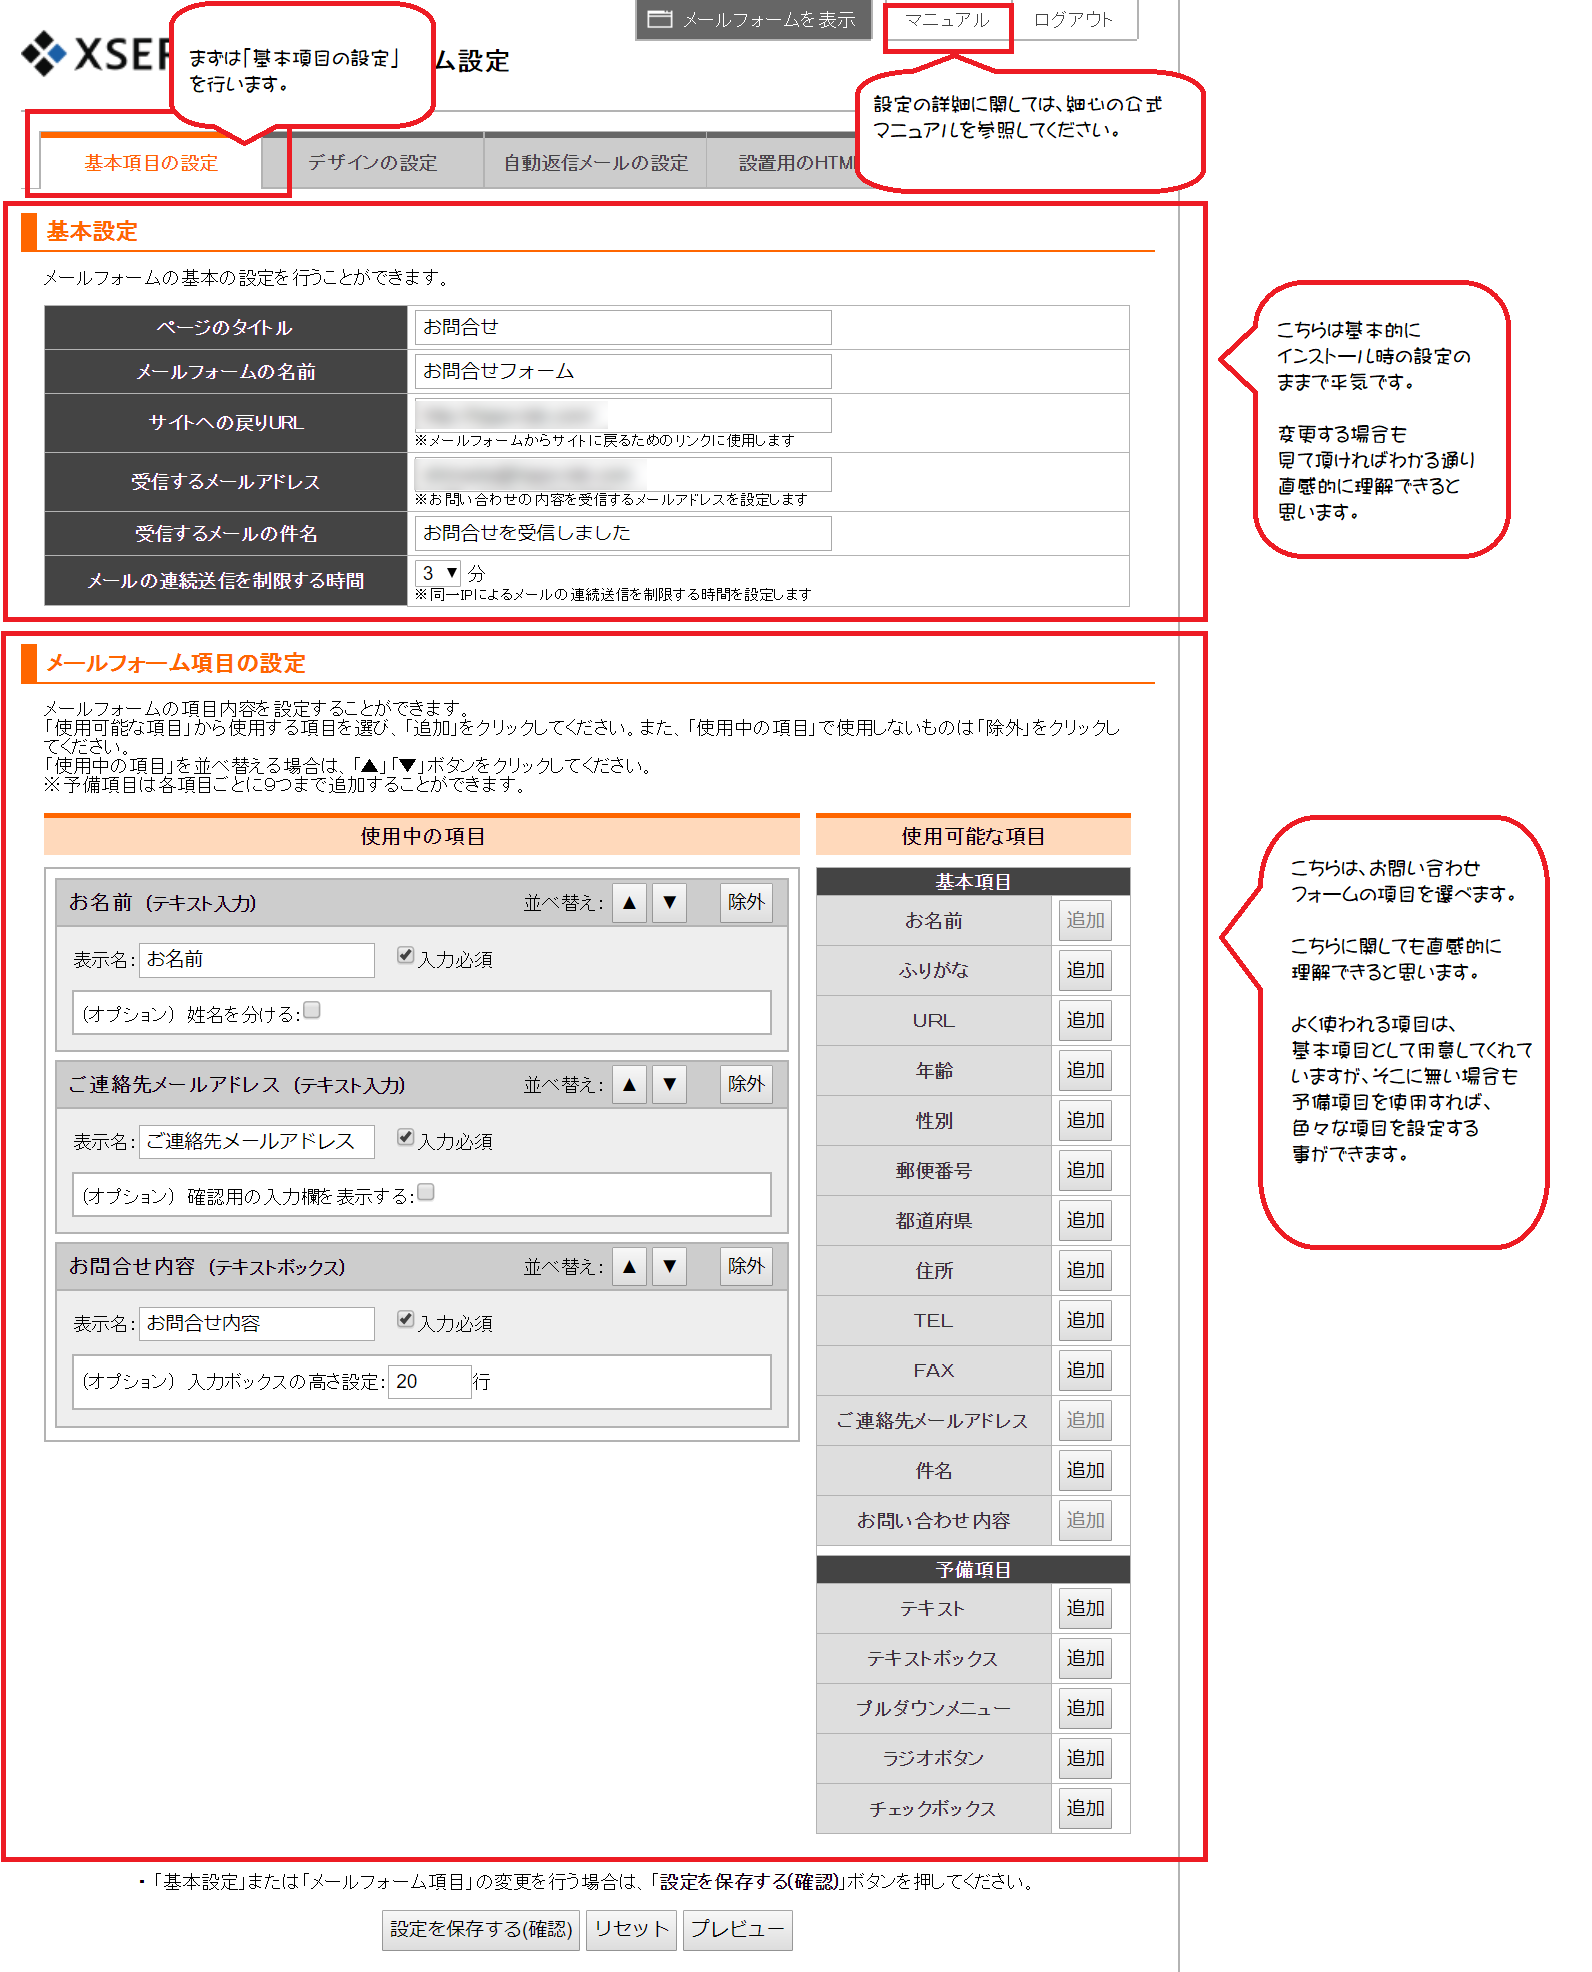
3.まず基本項目を設定します。(こちらは直感的に操作できると思うので説明を割愛します。もし詳しく知りたい場合は、画面右上にある「マニュアル」を参照してください。)
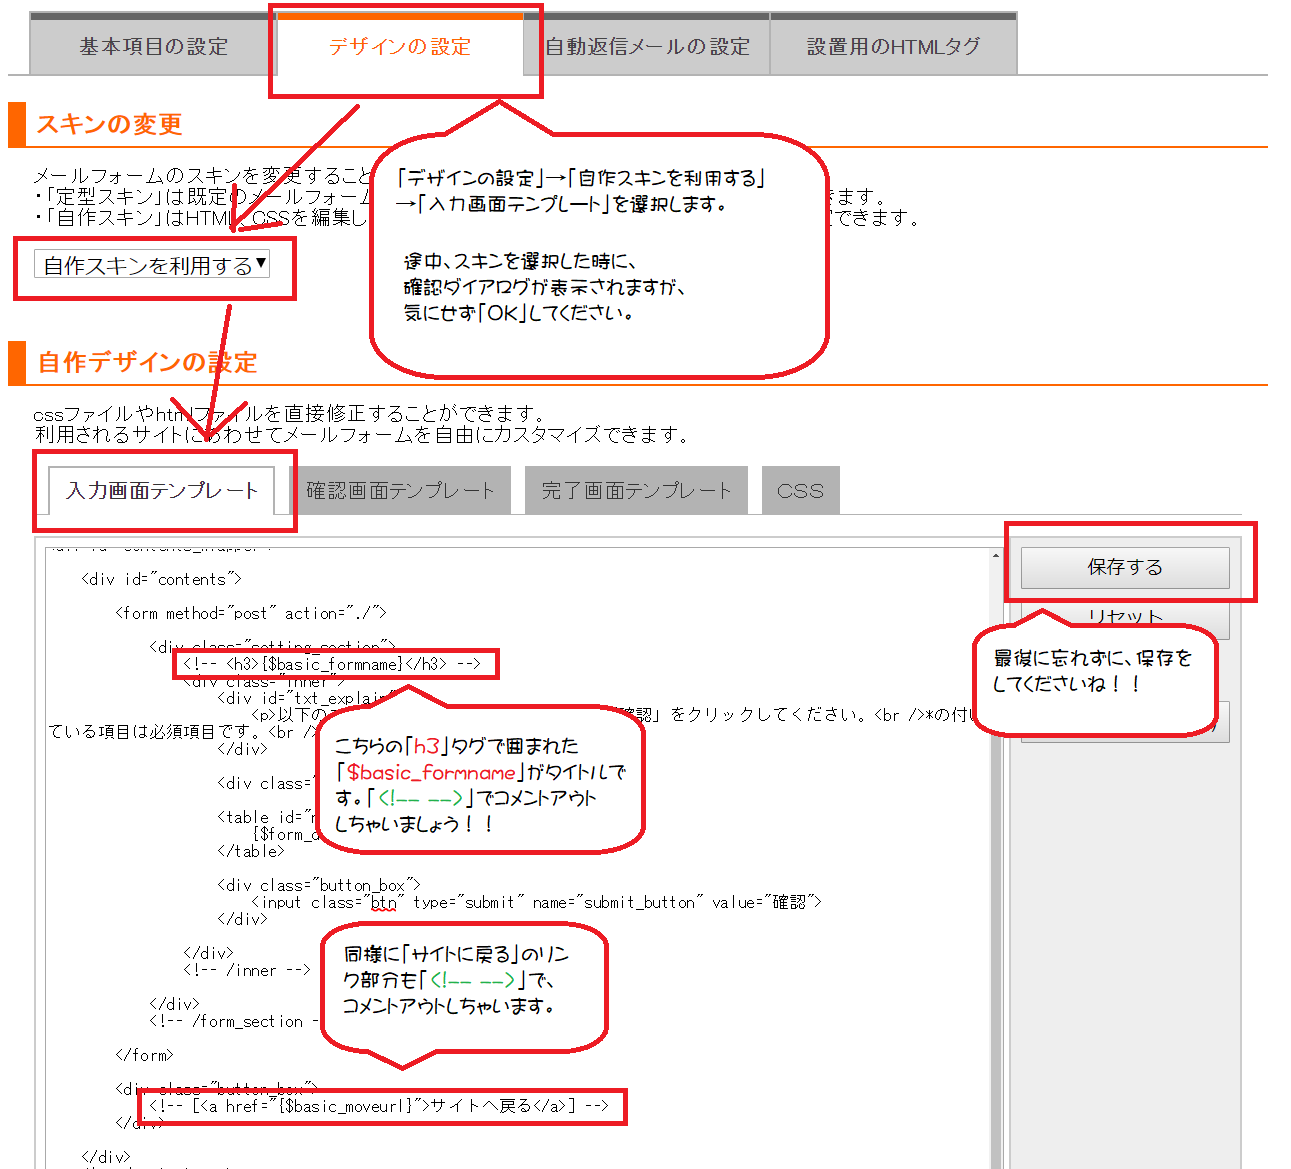
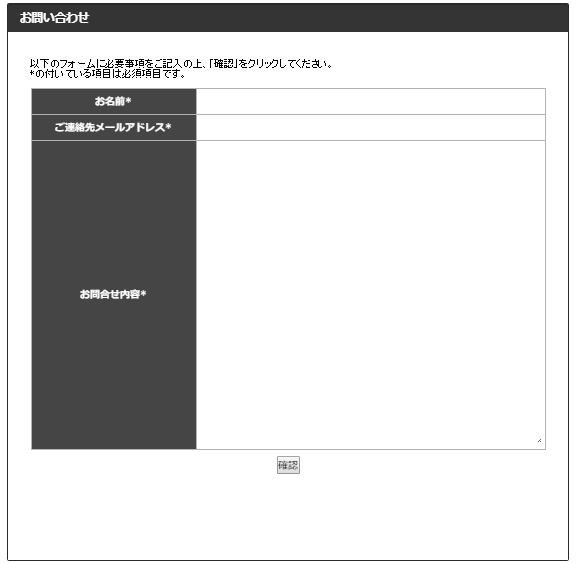
4.ここからが公式マニュアルにも載っていない部分です。まず「タイトル」と「サイトに戻る」リンクを削除したいと思います。

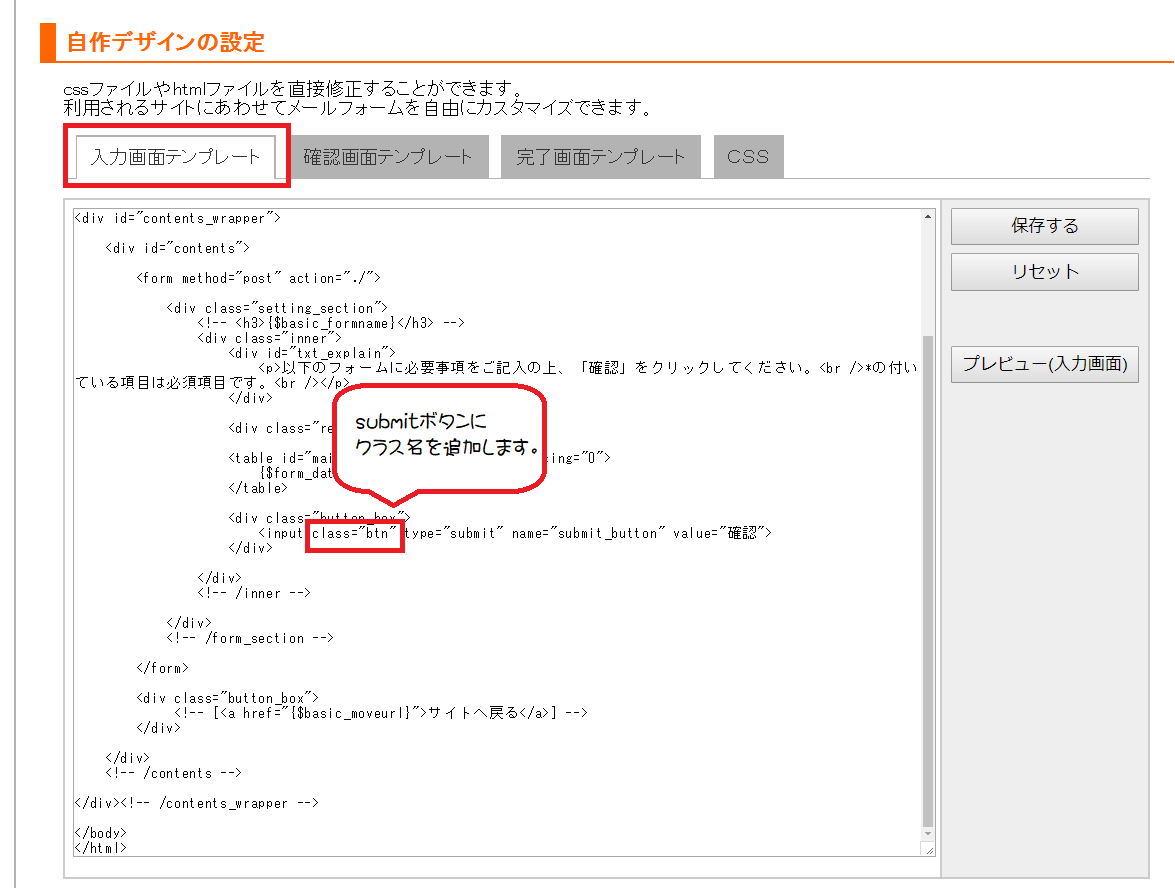
5.その場合は、図の様に「自作スキン」を利用して、「入力画面テンプレート」のHTMLを直接カスタマイズしてしまいます。
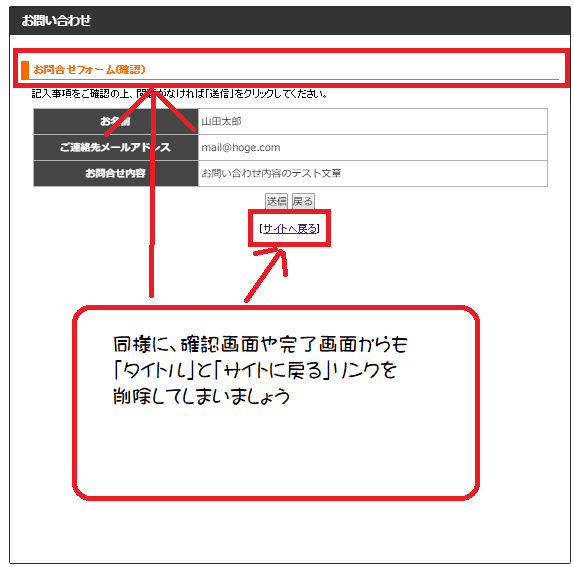
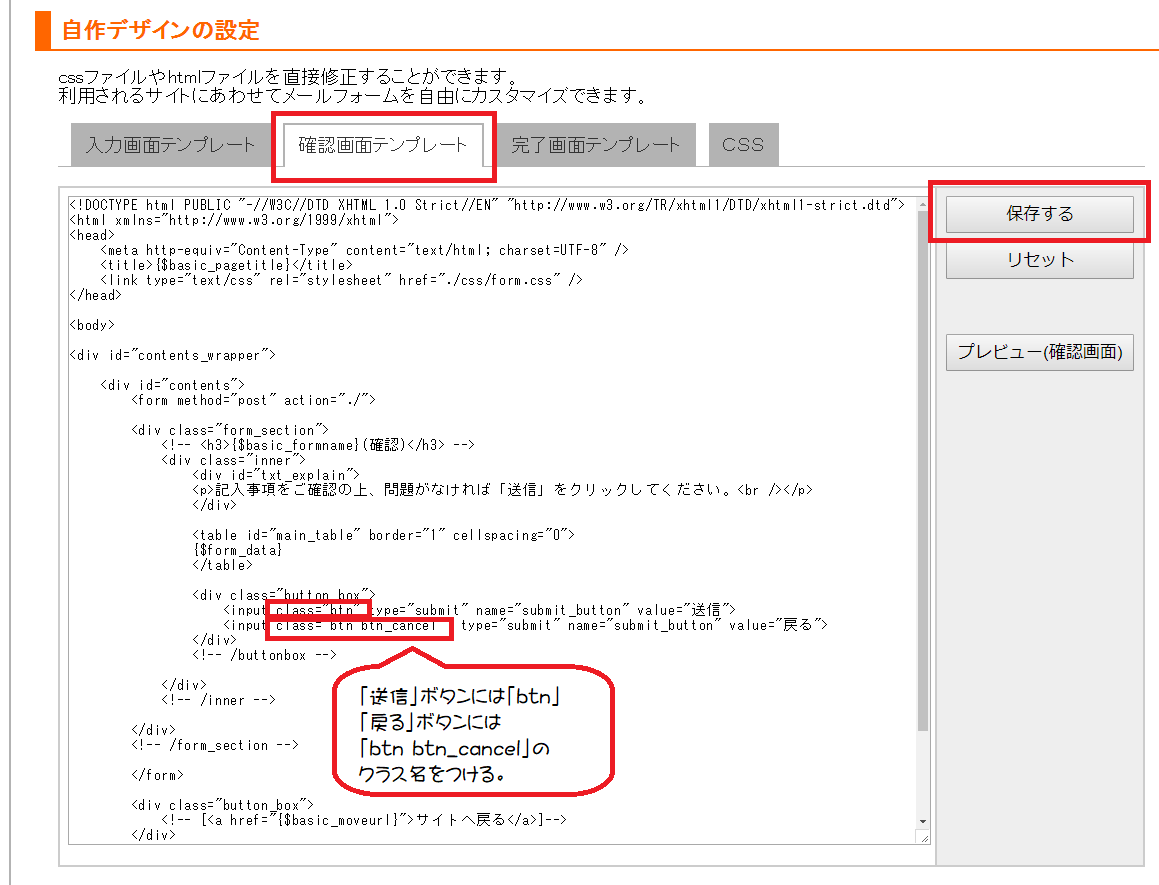
6.うっかり忘れがちですが、同様に「確認画面」や「完了画面」からも削除しましょう。
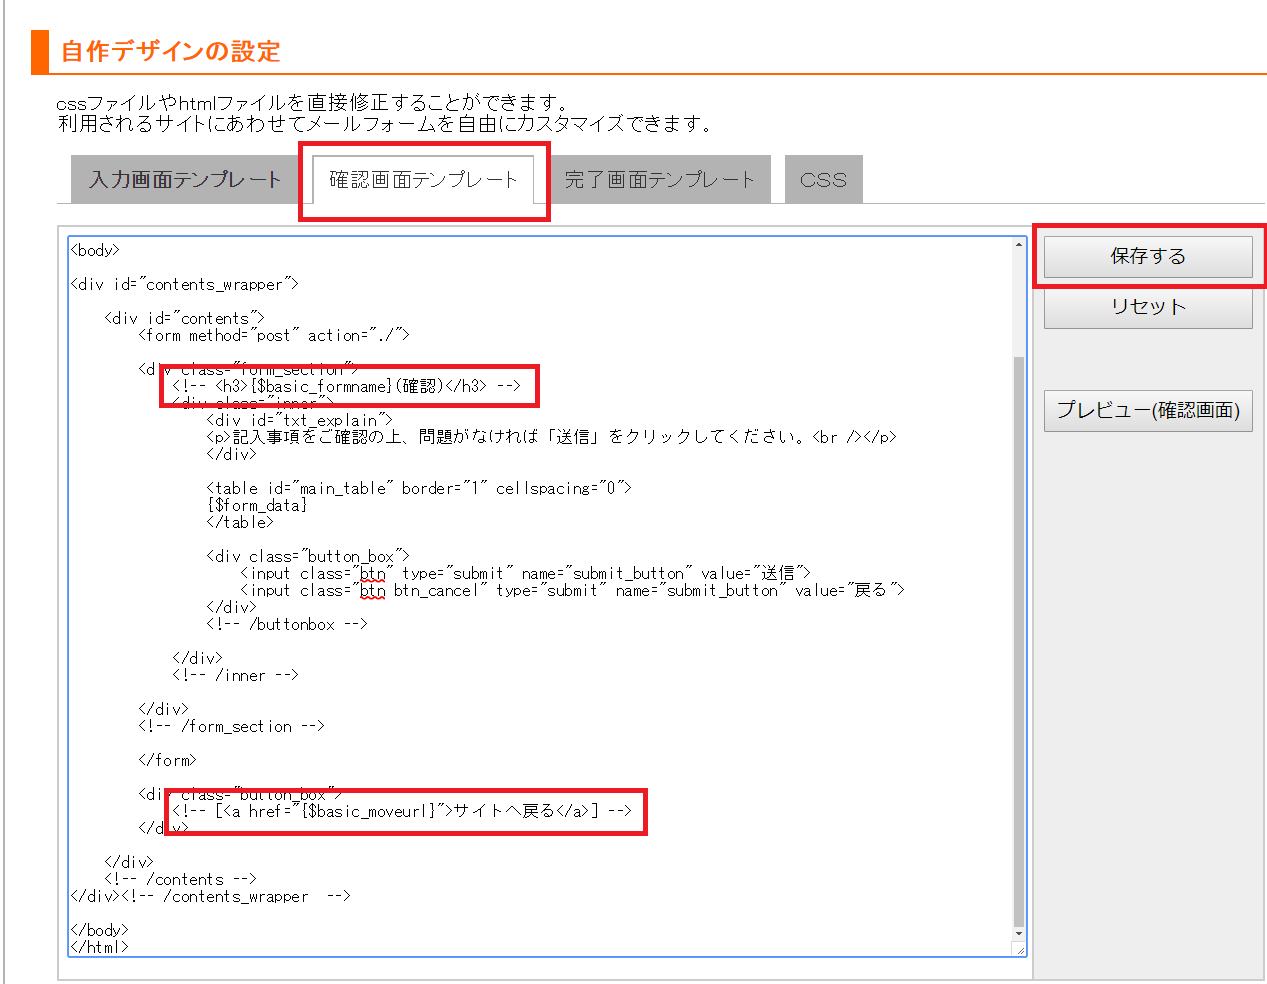
7.「手順5」と同様に「確認画面テンプレート」からも「h3」タグで囲まれた「$basic_formname」と「サイトに戻る」部分をコメントアウトしてしまいます。
8.「手順5」と同様に「完了画面テンプレート」からも「h3」タグで囲まれた「$basic_formname」と「サイトに戻る」部分をコメントアウトしてしまいます。

9.これで「タイトル」と「サイトに戻る」リンクが消えました♪
10.次にボタンに色を付けます。まず「入力画面テンプレート」のボタンにクラス名「btn」を追加します。
11.同様に「確認画面テンプレート」のボタンにもクラス名を付与します。この時、戻るボタンには「btn」に加えて「btn_cancel」も追加します。
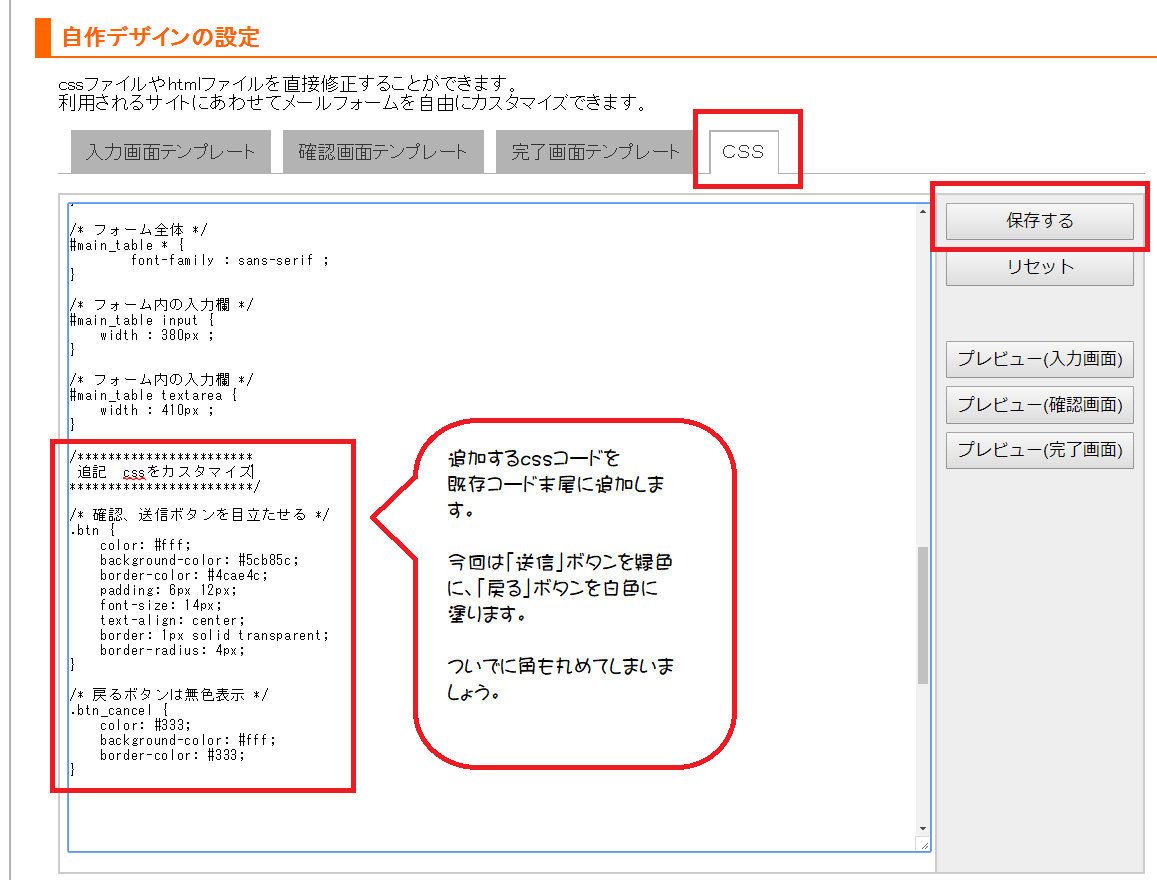
12.さて、いよいよcssを編集します。
13.こんな風になりました。

この様に、色々なカスタマイズができます。最後にサンプルを提供致します♪
サンプル
サンプルお問い合わせフォーム(実際に動きます)
追記したcss
/***********************
 追記 cssをカスタマイズ
************************/

/*「必須」というオレンジの文字を表示 */
.red {
    /* color: #ff3333; */
    font-size:0;
}
.red:before {
    background-color: #f0ad4e;
    color: #ffffff;
    padding: .2em .6em .3em;
    margin-left: 15px;
    font-size: 9px;
    content: "必須";
    border-radius: .25em;
}

/* 確認、送信ボタンを目立たせる */
.btn {
    color: #fff;
    background-color: #5cb85c;
    border-color: #4cae4c;
    display: inline-block;
    padding: 6px 12px;
    margin-bottom: 0;
    font-size: 14px;
    font-weight: 400;
    line-height: 1.42857143;
    text-align: center;
    white-space: nowrap;
    vertical-align: middle;
    -ms-touch-action: manipulation;
    touch-action: manipulation;
    cursor: pointer;
    -webkit-user-select: none;
    -moz-user-select: none;
    -ms-user-select: none;
    user-select: none;
    background-image: none;
    border: 1px solid transparent;
    border-radius: 4px;
}

/* 戻るボタンは無色表示 */
.btn_cancel {
    color: #333;
    background-color: #fff;
    border-color: #333;
}

/*コンテンツ部分*/
#contents_wrapper {
    width : 1500px ;
    max-width: 100%;
    border: none;
    padding: unset;
    margin: unset;
}

/*テーブルの幅変更*/
#contents table {
    width: 98%;
    margin: 0 auto;
    border-left: 1px solid #ffffff;
    border-top: 1px solid #ffffff;
    border-right: 1px solid #ffffff;
    border-bottom: 1px solid #ffffff;
}
/*テーブルの右側thの幅指定*/
#contents table th {
    background: none;
    color: #000000;
    width: 98%;
    padding: 0.5em;
    border-left: none;
    border-top: none;
    border-right: none;
    border-bottom: none;
}

/*テーブルのtdの幅指定*/
#contents table td {
    /* margin-left: 10px; */
    width: 98%;
    border-left: none;
    border-top: none;
    border-right: none;
    border-bottom: none;
}

/*INPUT入力部分の横幅を広げ、縦幅も指定*/
#main_table td input {
    width: 98%;
    resize: vertical; /*テキストエリア縦のみ変更*/
    height: 34px;
    border-radius: 4px;
    border: 1px solid #ccc;
}

/*テキストエリアの横幅を広げ、縦幅は指定しない(auto)*/
#main_table td textarea {
    width: 98%;
    resize: vertical; /*テキストエリア縦のみ変更*/
    border-radius: 4px;
    border: 1px solid #ccc;
}

/*SELECT入力部分は横幅を広げず、縦幅のみ指定*/
#main_table td select {
    height: 34px;
    border-radius: 4px;
    border: 1px solid #ccc;
}

/* 表を建て並びにする */
#main_table table,
#main_table tbody,
#main_table tr,
#main_table th,
#main_table td {
    display: block;
    border: none;
    text-align: left;
}

/* 項目(段落)スペース15px */
#main_table tr {
    margin-bottom: 15px;
}
